Inventor
We used Inventor to create a maze. Inventor is a software that is used to sketch and design. You can create designs in a 2D or 3D models. You can layer the designs to make a more complex shape. There are many tools that help create these models such as the dimension tool, line tool and rectangle tool. These tools help you create and measure your design.
Step-By-Step

I started off by making a circle. I made the radius 3 inches. Then I put two rectangles on each side. I made sure I line up the top lines. You know if you did this because when you make your second rectangle there should be a dotted line that shows up that tells you the lines are at a equal height. I made the width of these two rectangles 1 inch. this means the width of the entire maze is 8. the maximum width of the maze 8.5 inches. My height of the shape was 6 inches, and the maximum was 11 inches. Then, I dimensioned the rectangles so that they'd be equal to each other. The height I used for them was 1.5 inches.
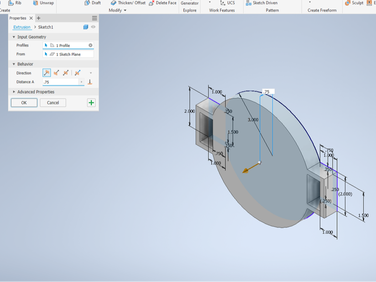
I extruded this sketch by 0.75 inches.
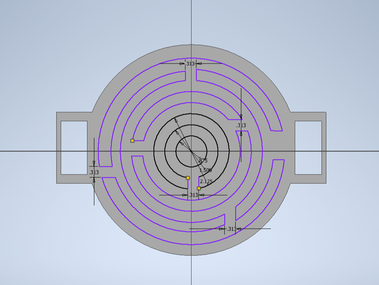
I made my largest circle from the same center point as the maze circle as made the diameter 5.25. This is because my diameter from the maze is 6 inches and then I had to subtract 6/8 from this. The border dimension is 3/8, but I needed that on each side so I multiplied that amount by two. Then I made a circle on the inside of this one from the same center point. The maze width is 5/16 and again I needed to double that so I used 10/16. I subtracted 10/16 from the diameter of the circle larger than this one (5.25.) I repeated this process until I got to the middle. Then, for the openings in the maze I made two parallel lines and trimmed away the excess to the opening. Then, I dimensioned this opening 5/16. I repeated this process till I made enough openings to get to the center.
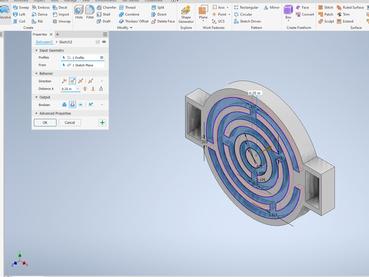
I extruded this sketch inward by 0.25 inches.
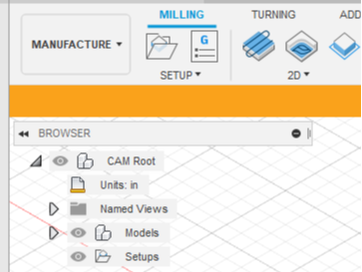
I opened up Fusion and clicked File New Part. Then, I hit the waffle up top and selected the file I wanted to use. I started by changing the top drop down from Design to Manufacture. Then underneath I changed the units from millimeters to inches.

|
|
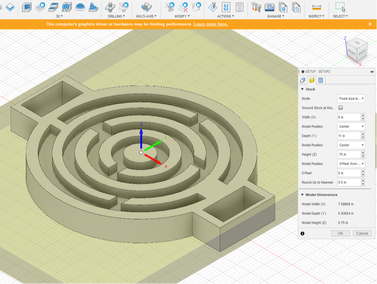
Then, I clicked Setup and New Setup. Under the Setup tab I changed the Stock box point. As seen in the first picture. Then I went to the Stock tab. Here I changed the dimensions of my stock. Which was 8x11x.75. As seen in the second picture.
|
|
|

|
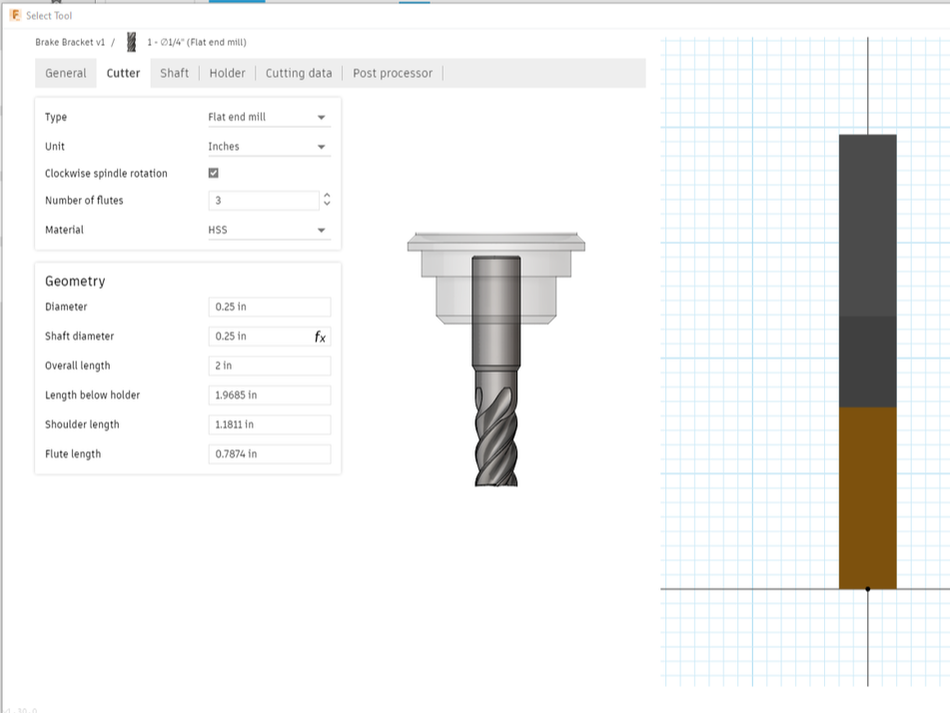
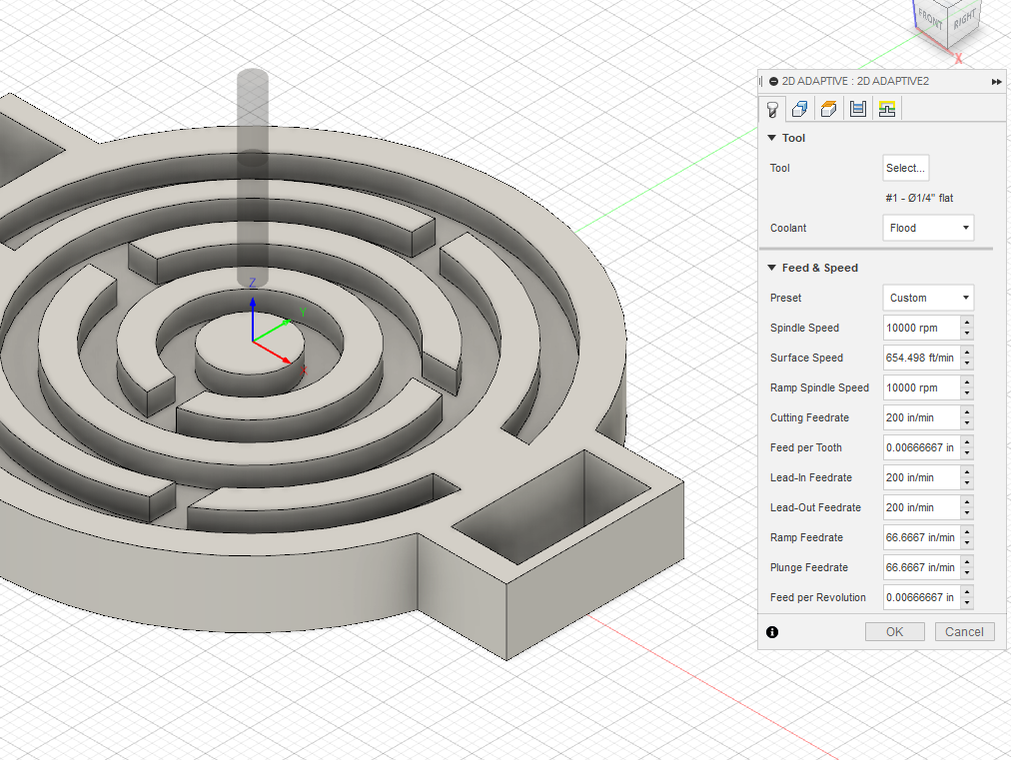
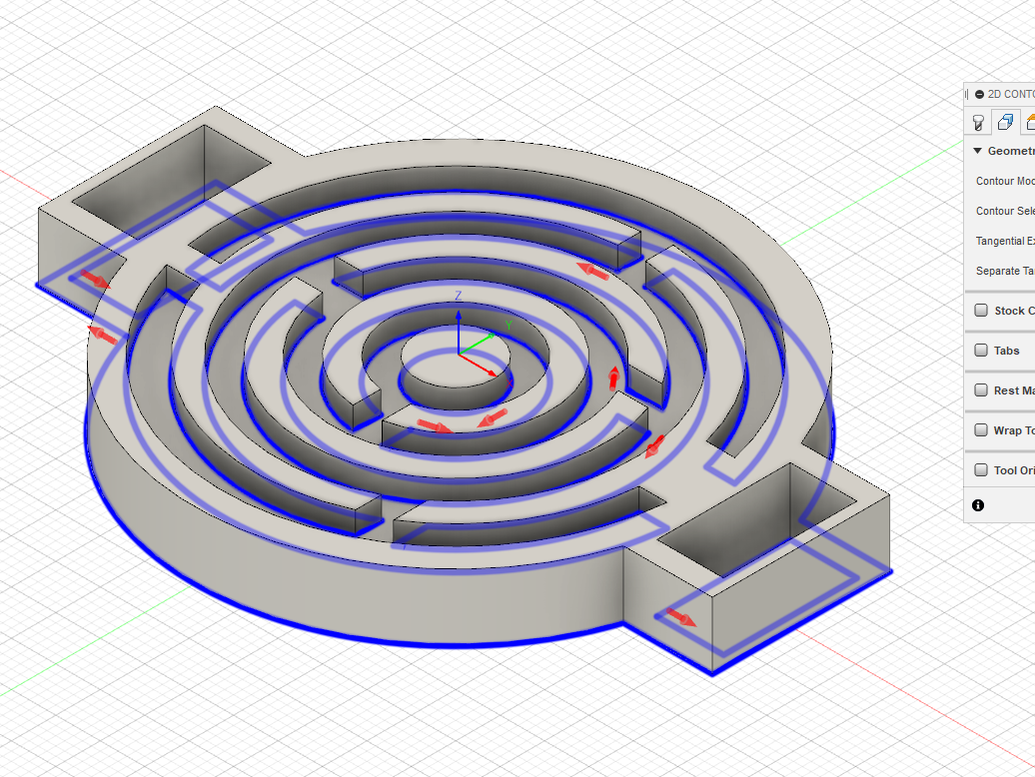
I went under the 2D tab and clicked 2D Contour. From there I clicked the tool button and made my tool. It was a flat ended mill. I changed the diameter to 0.25 and the overall length to 2. Then I clicked ok. Under the Feed and Speed portion of the tab I changed the Spindle Speed to 10,000 rpm and the Cutting Feed Rate to 200 rpm. Next, I went to the Geometry tab and clicked at the bottom of all of the parts of my maze. Then I went to the Passes tab. In there I changed the maximum roughing speed to 0.25 and the stock to leave to 0.
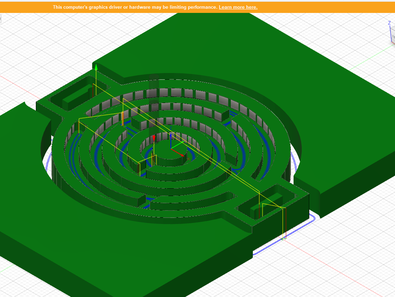
This is my final maze in Fusion. I uploaded this to my flash drive.
|
|
|
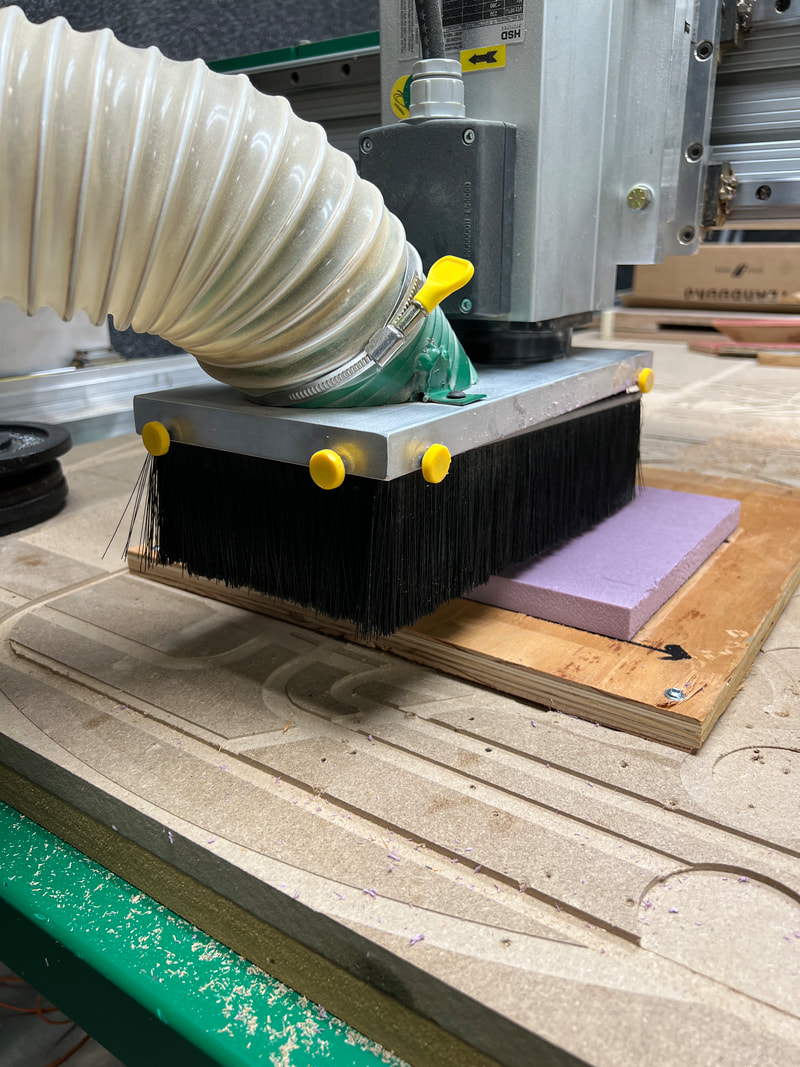
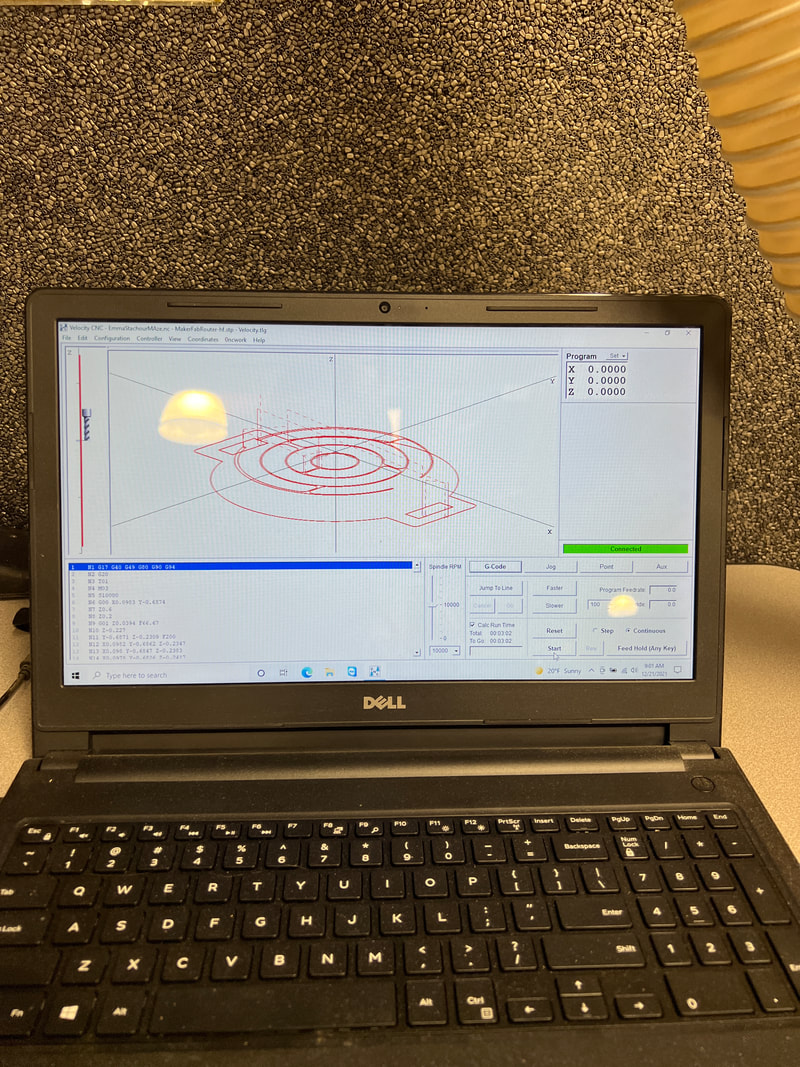
I measured the exact center point and dotted it with a marker. Then, I put the foam on the board with a couple pieces of double sided tape on the back. I adjusted the router to the middle point of my stock. I uploaded my file onto the computer and zeroed out all the points. I clicked reset and cycle start to start cutting.

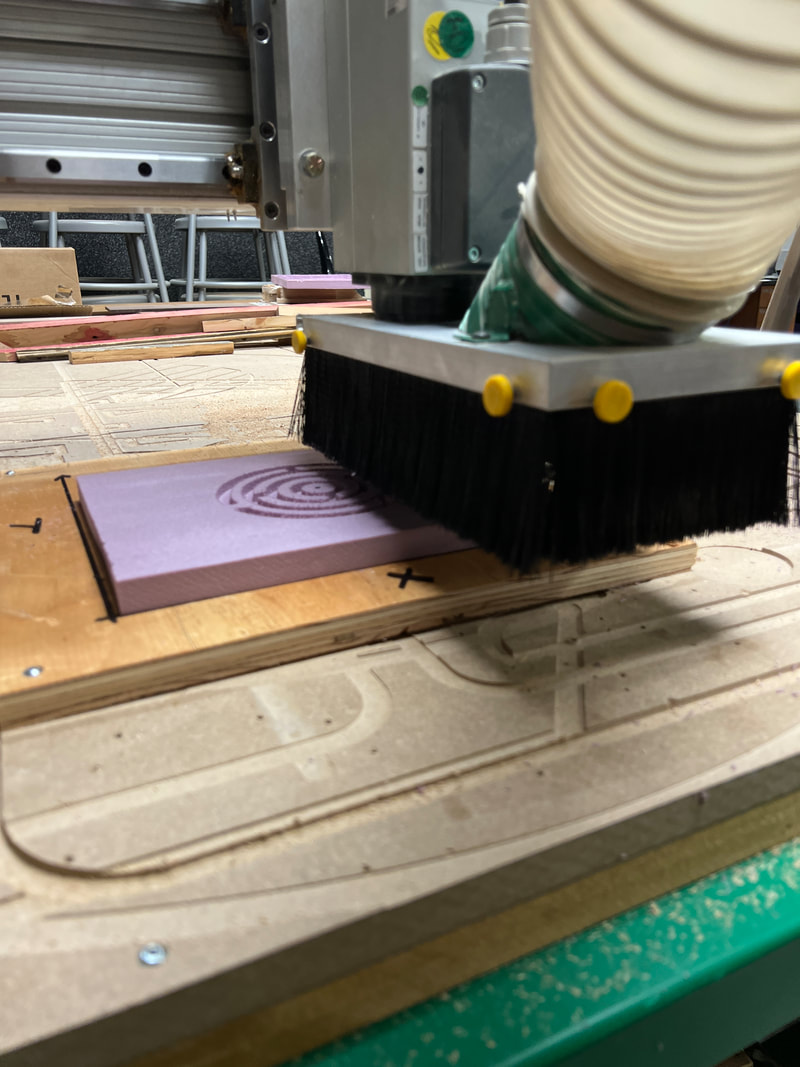
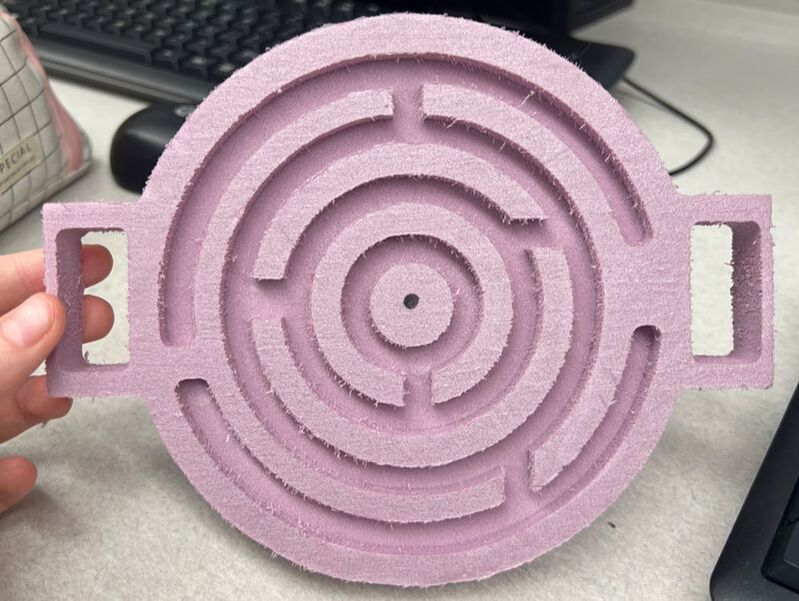
This is a picture of my maze after the router.
|
|
|
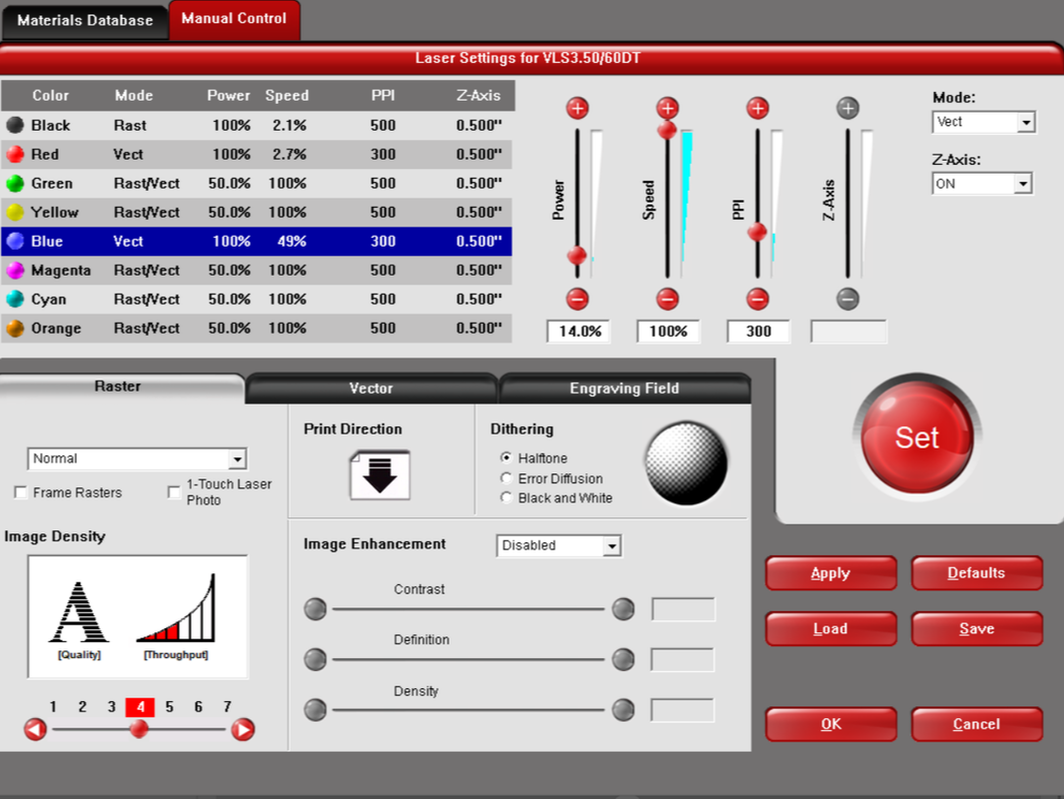
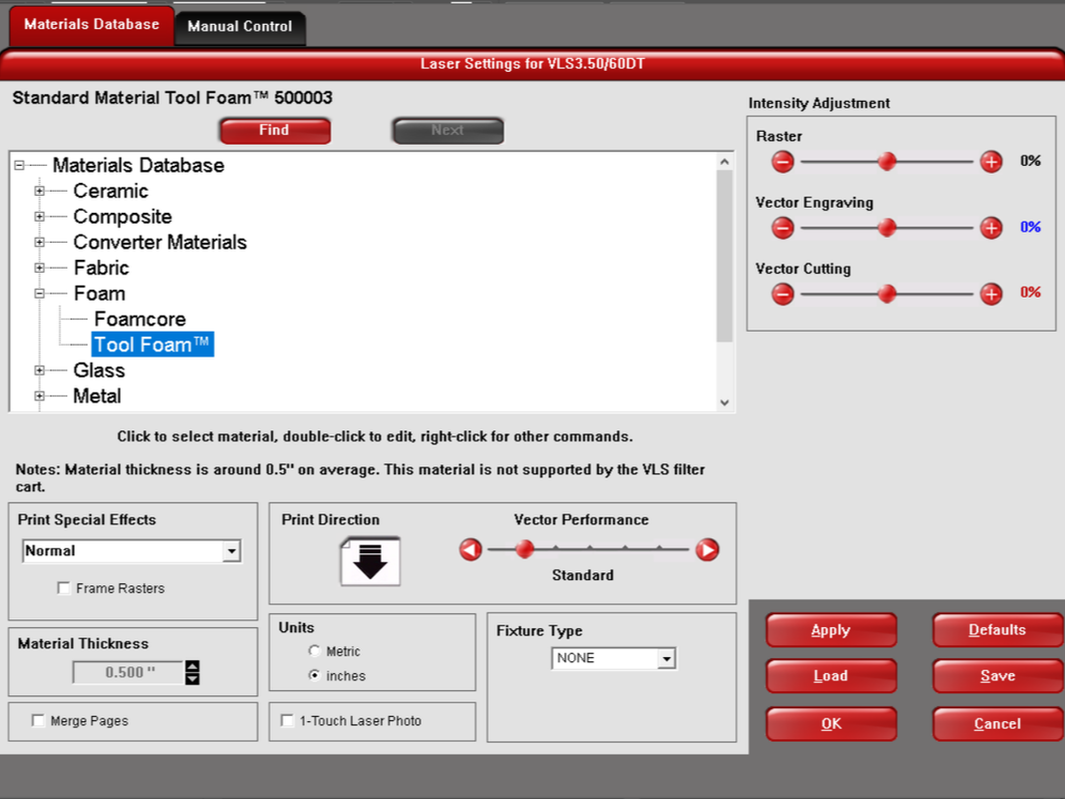
I went to the laser engraver and got on the computer. I plugged in my flash drive and opened my laser maze files. I did my name and class period separate in order to fit them on my maze. From there, I clicked File, Print, Setup, Preferences. This pulls up the settings for the engraver. For this project I used tool foam for my material, so under the materials tab I clicked Foam, Tool Foam. I clicked, Apply. Then, I went over to manual control. I clicked Blue and change the power to 14% and speed to 100%. Then, I clicked Apply, Ok and Print. From there I opened up UCP. My design popped up on the screen and I re positioned it and check that the laser wouldn't go off my material. Then I clicked the green Play button and watched the laser engrave.
What I Learned
I learned how to operate the router which I am very excited about. This project had a lot of math and measurements involved, so it helped combine creativity and math. I got more comfortable with Fusion 360. This project was a success and I am so happy about how my maze turned out.
