Inventor
We used Inventor to create a brake bracket. Inventor is a software that is used to sketch and design. You can create designs in a 2D or 3D models. You can layer the designs to make a more complex shape. There are many tools that help create these models such as the dimension tool, line tool and rectangle tool. These tools help you create and measure your design.
Step-By-Step
|
|
|
|
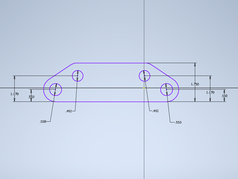
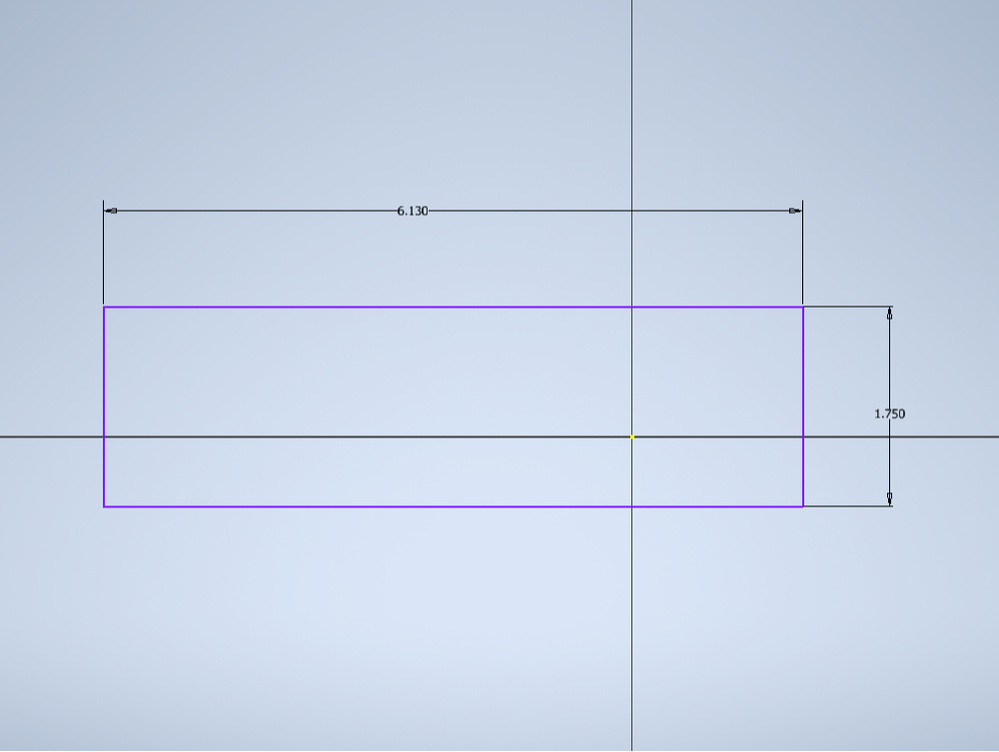
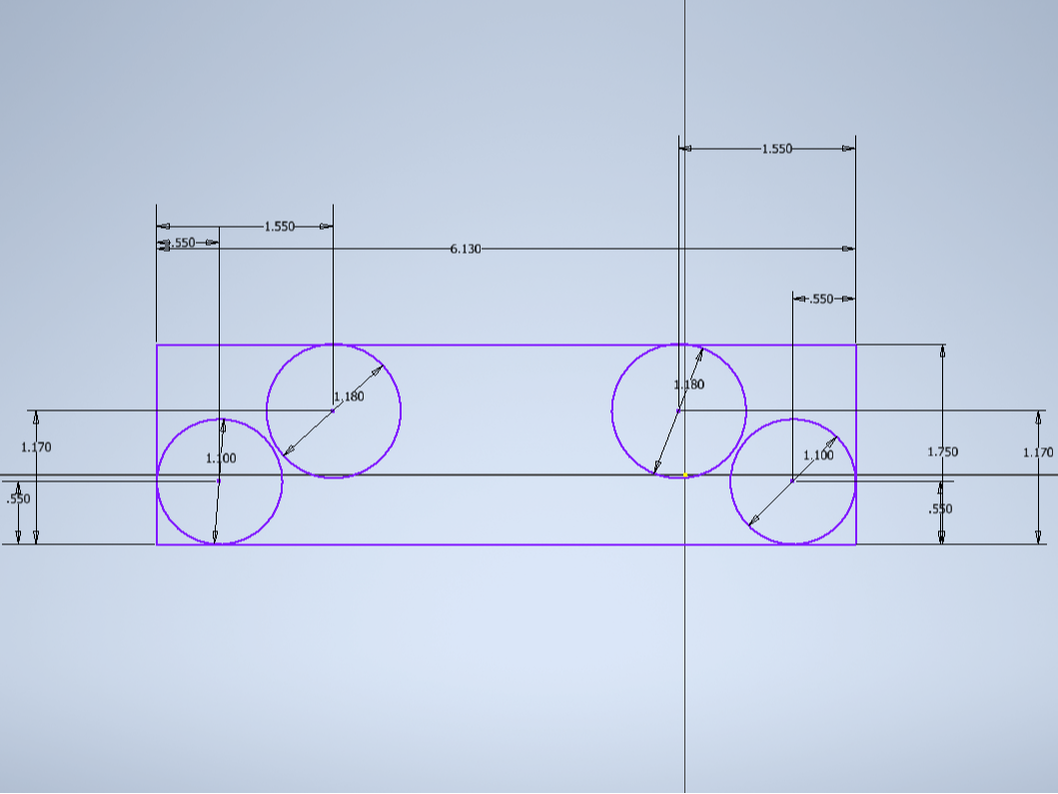
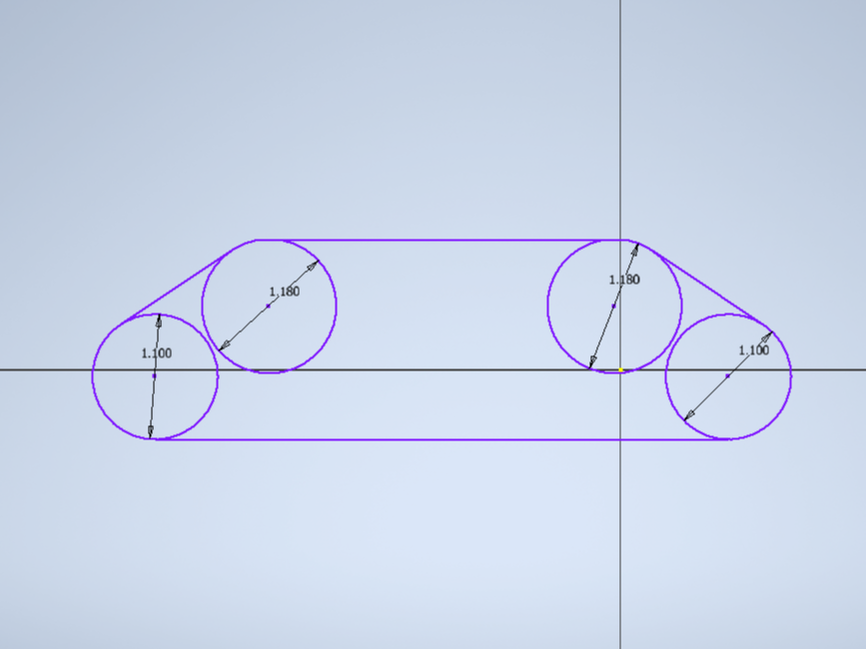
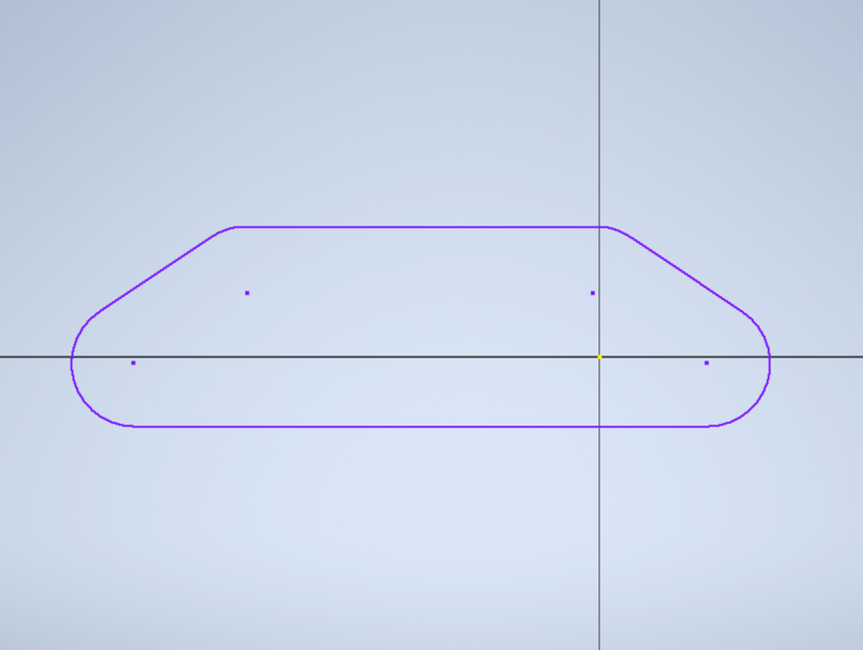
I started off by making a rectangle. I made two circles on the top and two on the bottom. The sheet gave us the radius of these circles, so I multiplied the radius by two to get the diameter. I distanced these circles by the dimensions given on the sheet. Then, I created two diagonal lines on each side of the rectangle. On the top, I clicked the tangent tool. This tool looks like a circle with a line connected to it. I clicked one diagonal line and then a circle. This made the line and the circle touch. I did the same thing to the other circle on this side to the same line. There should be two circles connected to one diagonal line. I repeated this process on the other diagonal line on the other side. I used the trim tool to get rid of the extra lines. This made the outside line look like a curved trapezoid. I made four smaller circles by putting the center spot in the exact spot as the four circles I previously made. I used the radius from the sheet to dimension the circles.
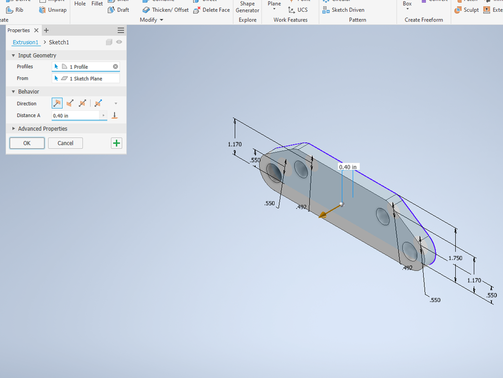
I finished the sketch and extruded it by 0.40 inches.
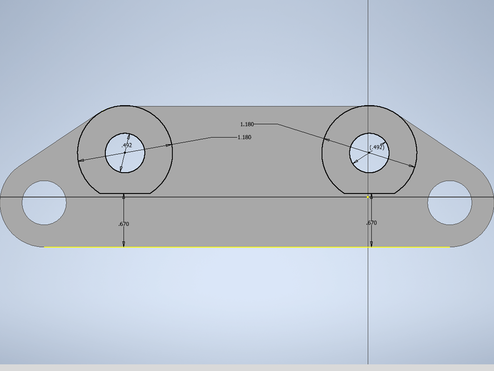
I created two circles on the top on the same center point as before. I used the same diameter as the first two top circles I created that were big which was 1.18 inches. Then, I made two smaller circles in the middle from the same center point. It should be the same exact size as the circles that were cut out from the last sketch so 0.492 inches. Next, I created a line going through the whole entire shape. I made this line be 0.67 inches from the bottom of the brake bracket. I trimmed the line and the bottom of the circles to make the circles come to the flat edge.
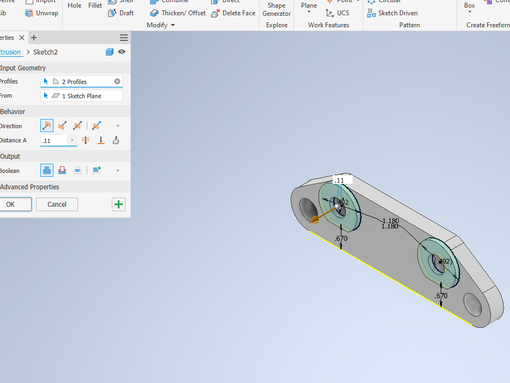
I finished the sketch and extruded the sketch by 0.11 inches.
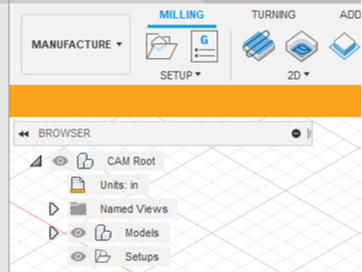
I opened up Fusion and clicked File New Part. Then, I hit the waffle up top and selected the file I wanted to use. I started by changing the top drop down from Design to Manufacture. Then underneath I changed the units from millimeters to inches.
|
|
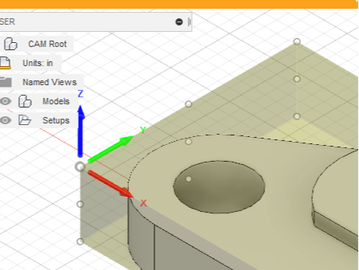
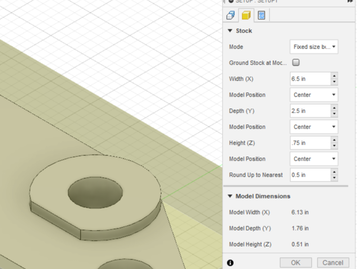
Then, I clicked Setup and New Setup. Under the Setup tab I changed the Stock box point. As seen in the first picture. Then I went to the Stock tab. Here I changed the dimensions of my stock. Which was 6.5x2.5x.75. As seen in the second picture.

|
|
|
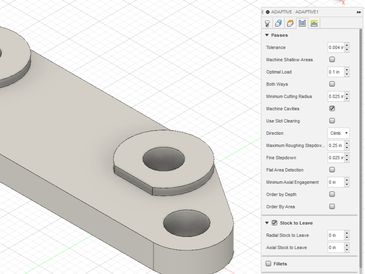
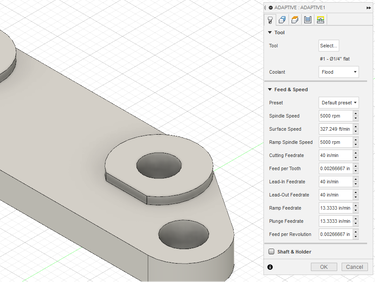
I went under the 3D tab and clicked Adaptive Clearing. From there I clicked the tool button and made my tool. It was a flat ended mill. I changed the diameter to 0.25 and the overall length to 2. Then I clicked ok. Under the Feed and Speed portion of the tab I didn't need to change anything. Then I went to the Passes tab. In there I changed the maximum roughing speed to 0.25 and the stock to leave to 0.
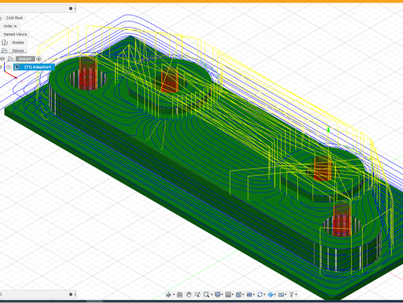
This is my finished brake bracket on Fusion.
Mill
|
|
|
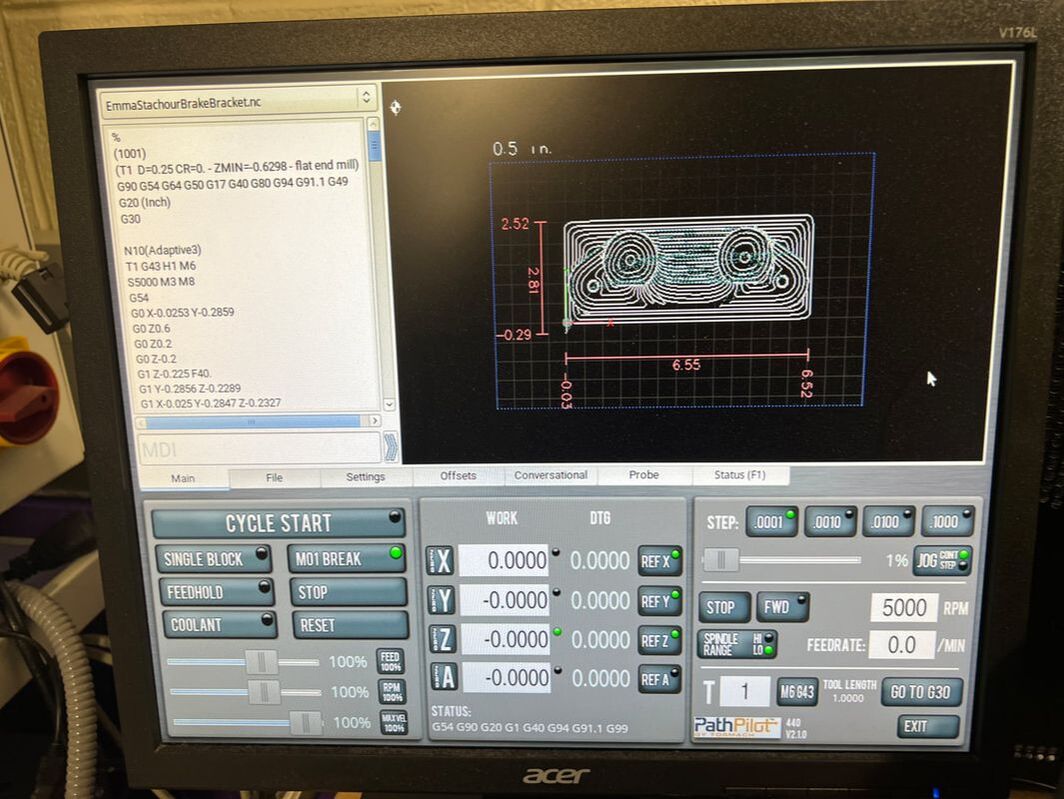
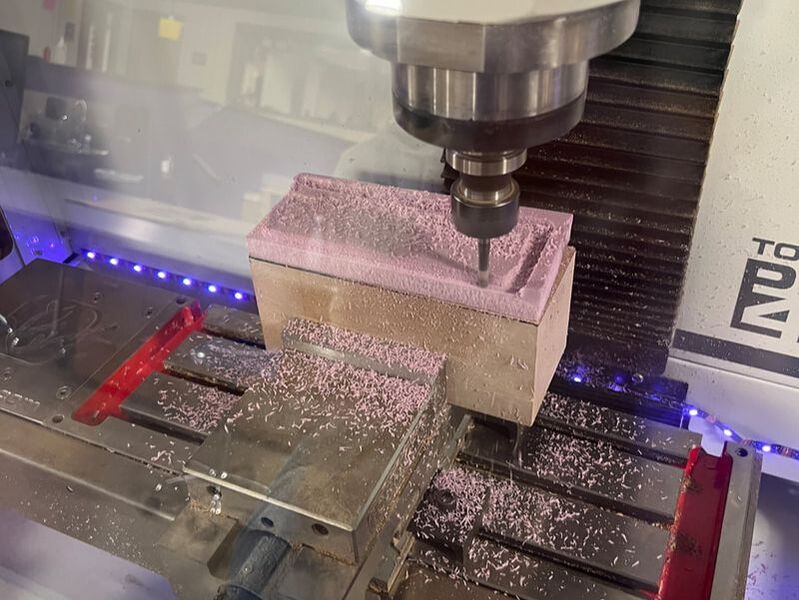
I put the foam on the rosin with a piece of double sided tape on the back. Then I adjusted the mill to the corner of my stock. I uploaded my file onto the computer and zeroed out all the points. I clicked reset and cycle start to start cutting.
|
|

|
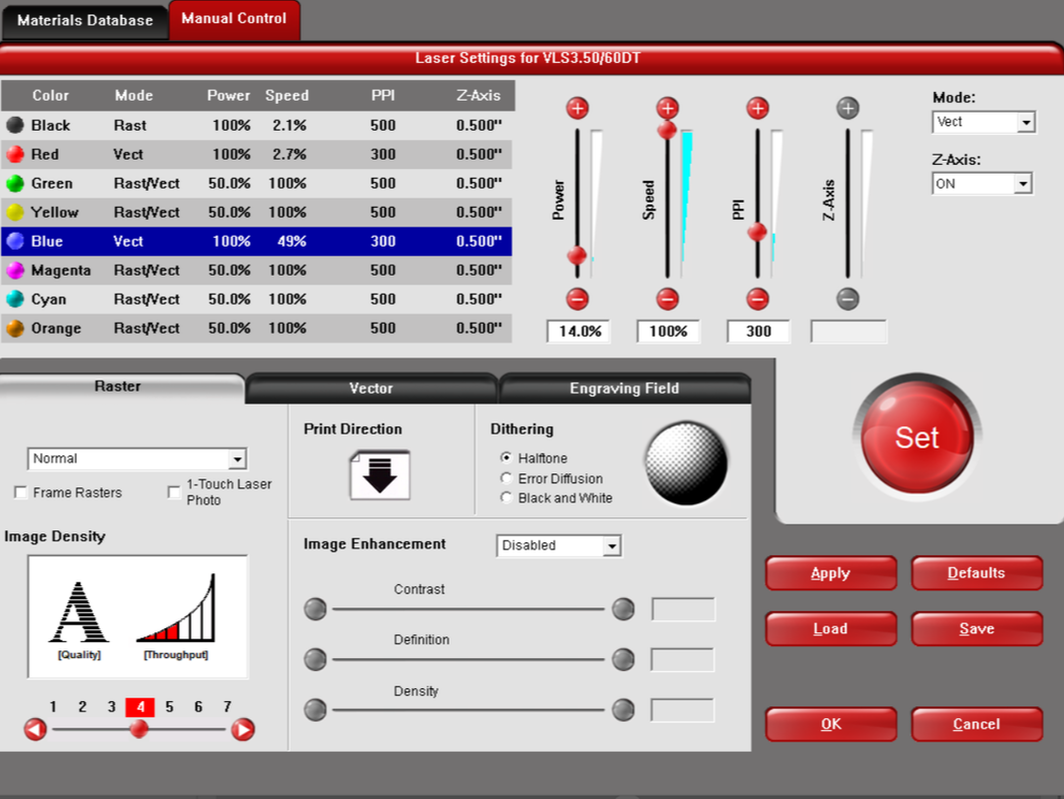
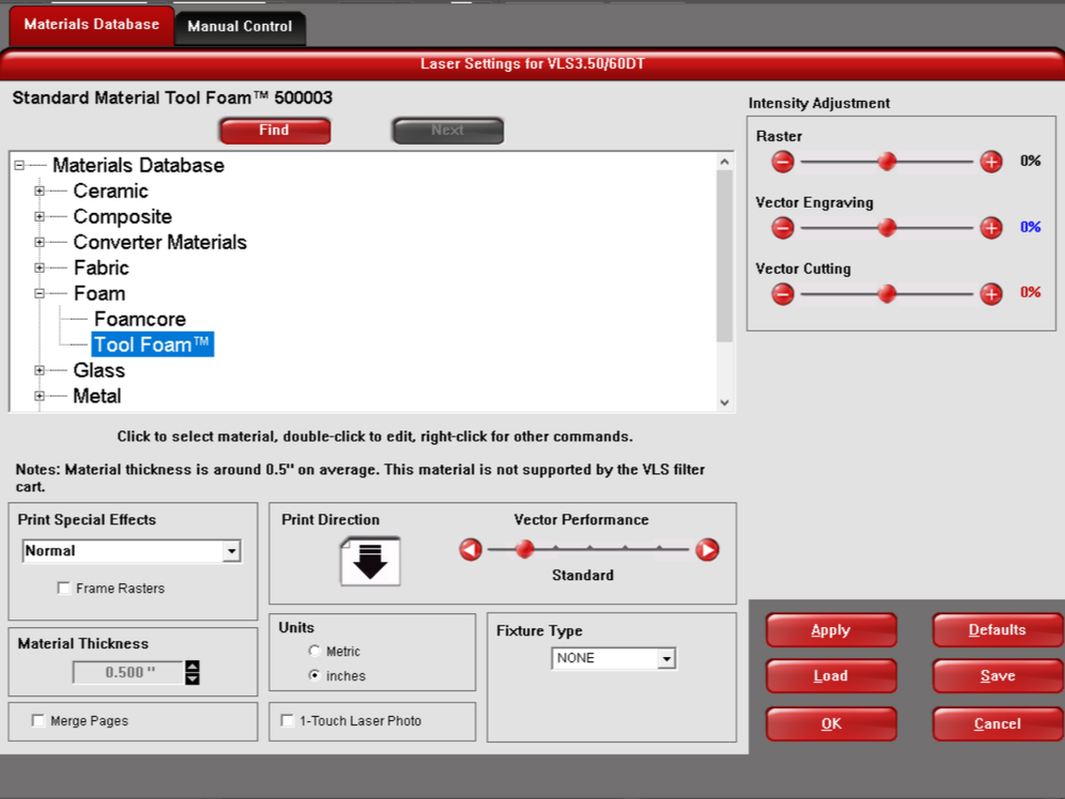
I went to the laser engraver and got on the computer. I plugged in my flash drive and opened my laser brake file. From there, I clicked File, Print, Setup, Preferences. This pulls up the settings for the engraver. For this project I used tool foam for my material, so under the materials tab I clicked Foam, Tool Foam. I clicked, Apply. Then, I went over to manual control. I clicked Blue and change the power to 14% and speed to 100%. Then, I clicked Apply, Ok and Print. From there I opened up UCP. My design popped up on the screen and I re positioned it and check that the laser wouldn't go off my material. Then I clicked the green Play button and watched the laser engrave.
|
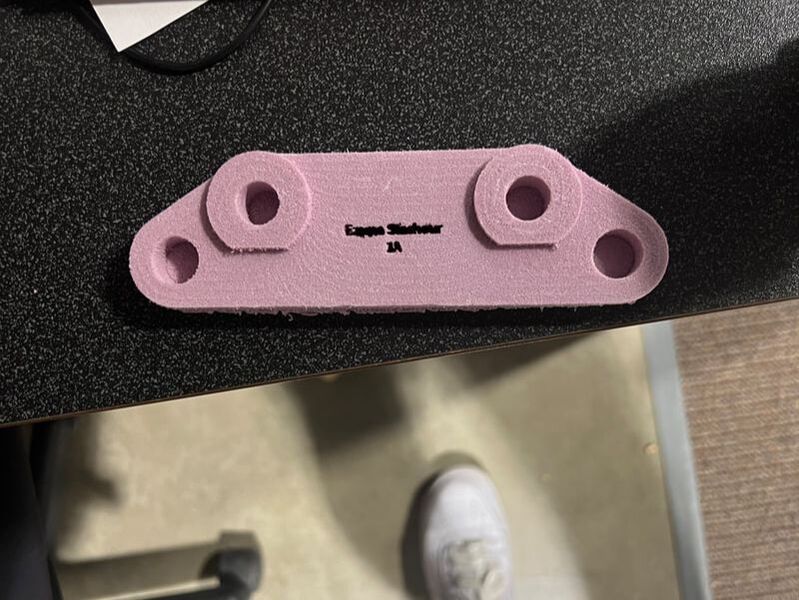
|
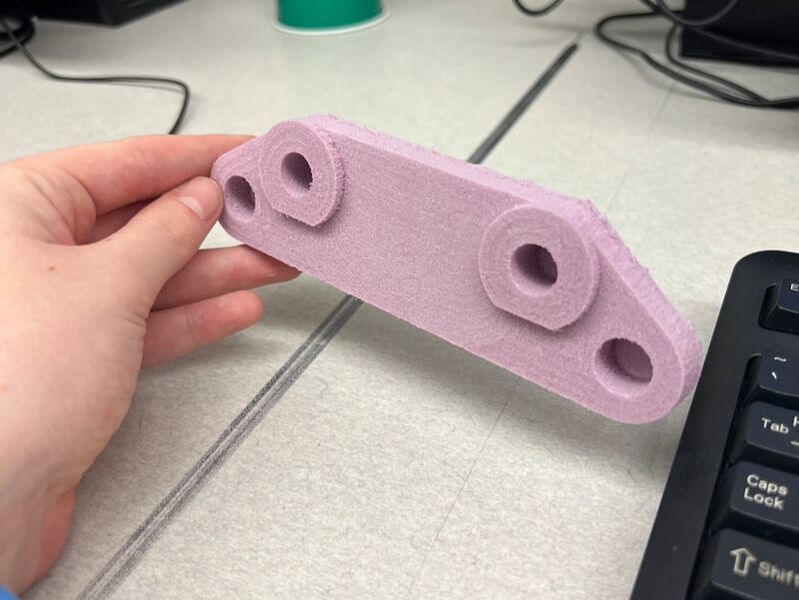
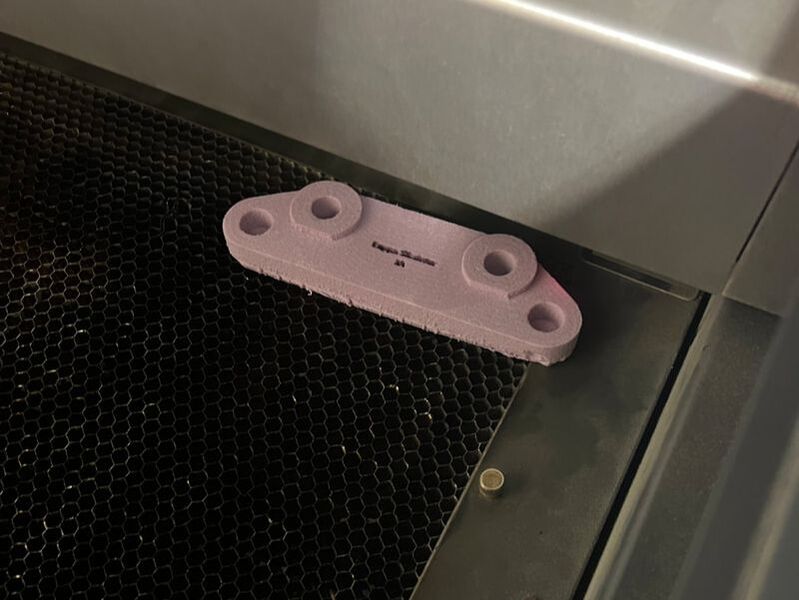
The first picture is of my brake bracket being engraved. The second is my final break bracket.
What I Learned
I learned how to use Fusion 360. I now understand how the tool paths work and the different settings to use. I also learned how to use the CNC mill. I have never worked on anything remotely close to this before. I feel confident in using it now.
